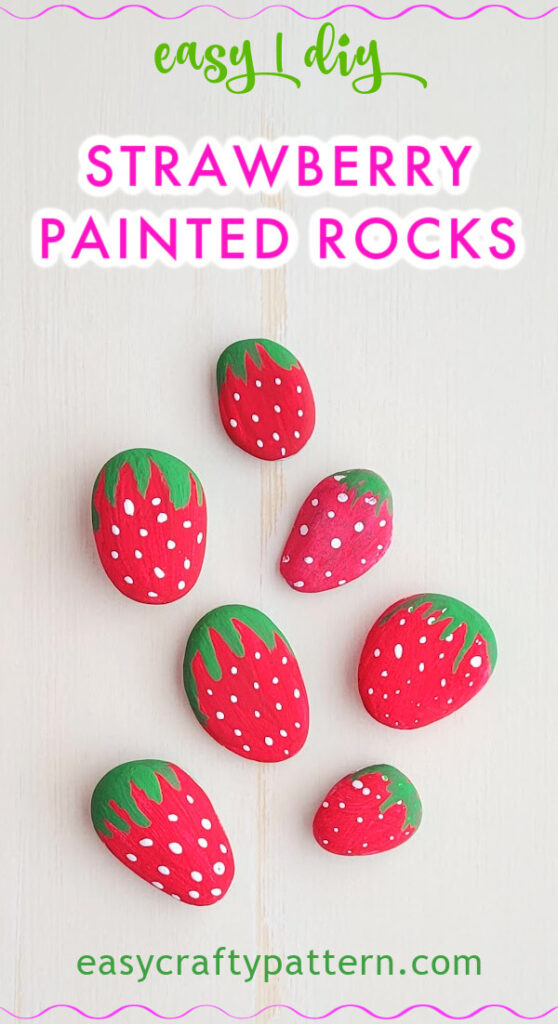
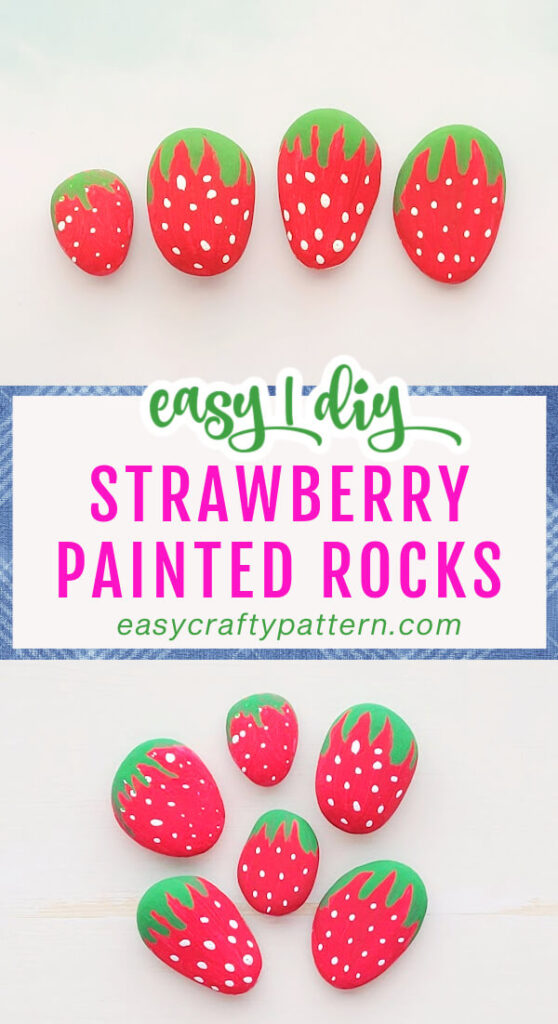
Strawberry Painted Rocks Tutorial For Garden
Turn the round or oval flat rocks into strawberry painted rocks for the treasure game or for the decoy in the garden to keep birds away.
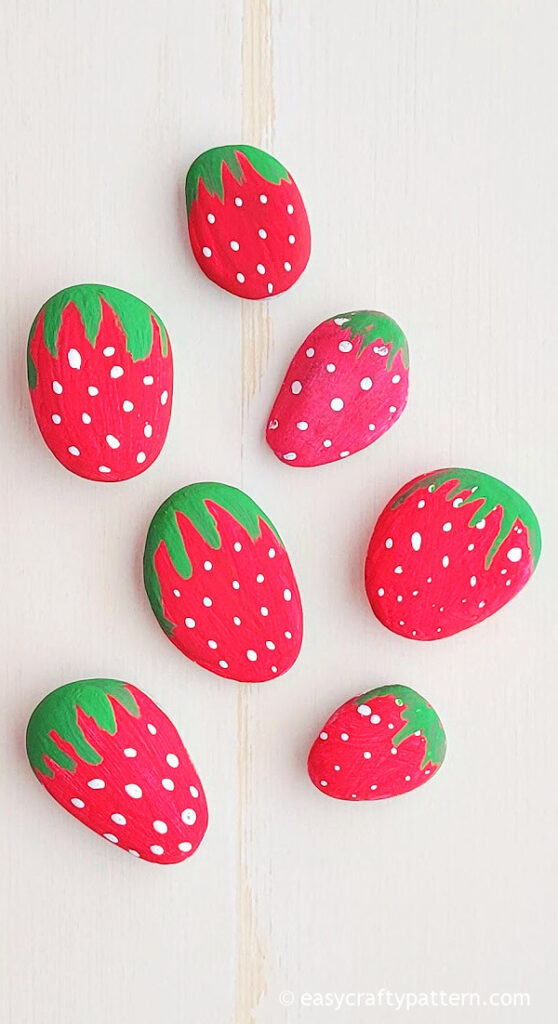
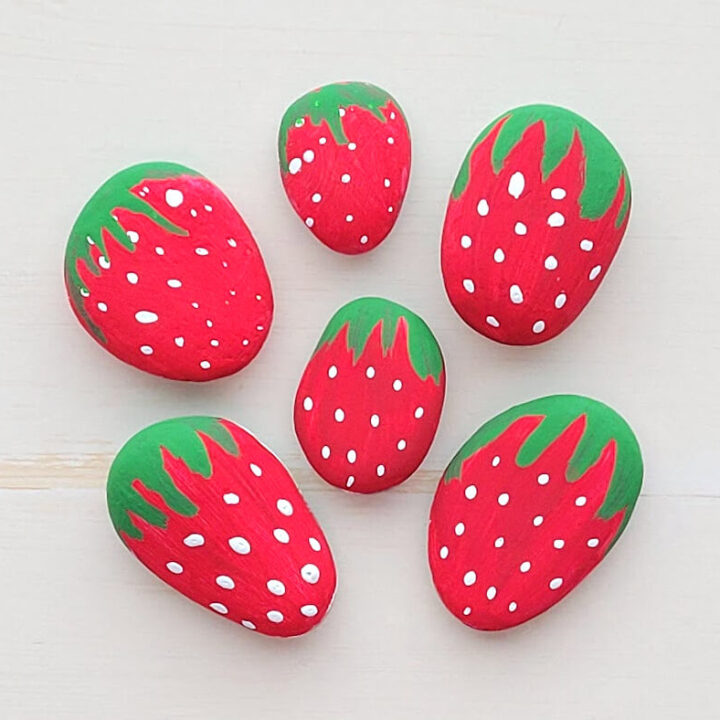
Strawberry Rock Painting Idea
When it comes to summer, the garden is full of strawberries ready to pick, but birds also want them. So, it is time for the DIY project for the garden so you can also harvest the strawberries.
This tutorial shows how to paint strawberries on rocks as a decoy to keep birds away. Just use a little painting brush, so you can also make strawberry rock art.
Supply To Make Strawberry Rocks
Use strawberry shape rocks like oval or flat ones. These rocks are easily found in the garden if you have a gravel pad or on the riverside.
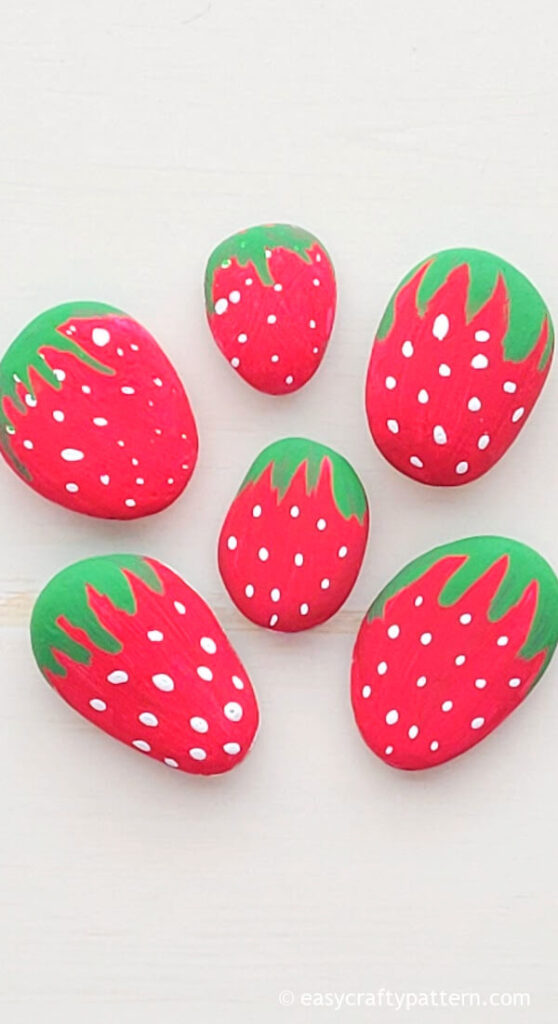
Most craft stores or dollar stores carry flat rocks for craft projects if it is too far from the riverside or the gravel pad is unavailable.
Use acrylic paint for painting the rock. The inexpensive one from the dollar store works just fine. You can apply the seal coating once the paint dries, but the strawberry rocks we painted a few years ago still look fine, even though it is always outside through winter.
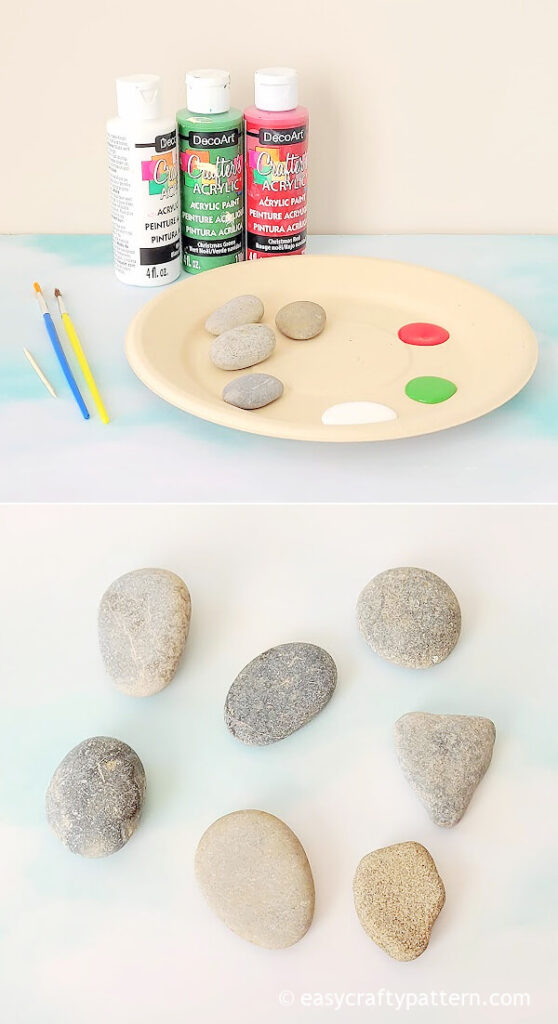
- Round or oval-shaped rocks
- White acrylic paint
- Red acrylic paint
- Green acrylic paint
- Paintbrush
- Toothpick
- Paint pallet or paper plate
Strawberry Painted Rocks Tutorial
Paint the rocks with white paint as the base colour.
Paint the rock on one or both sides.
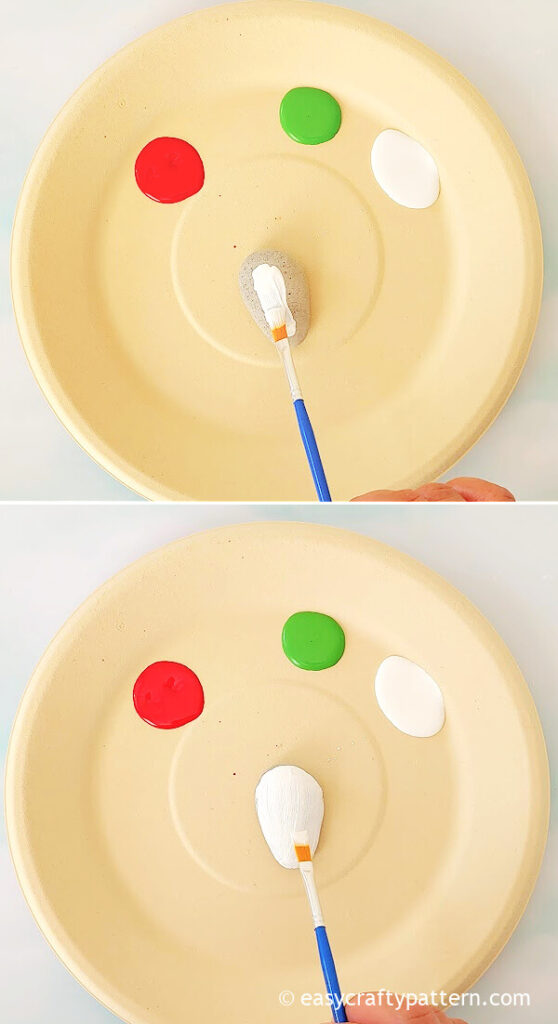
Leave it for about 10 minutes until the paint dries up.
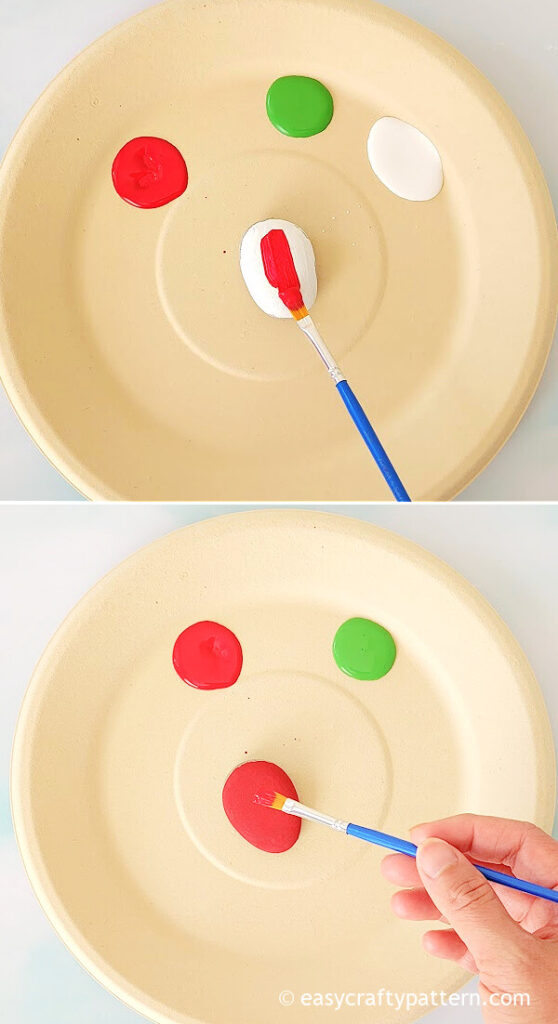
Apply the red paint over the white one.
Leave it for about 10 minutes until the paint dries up.
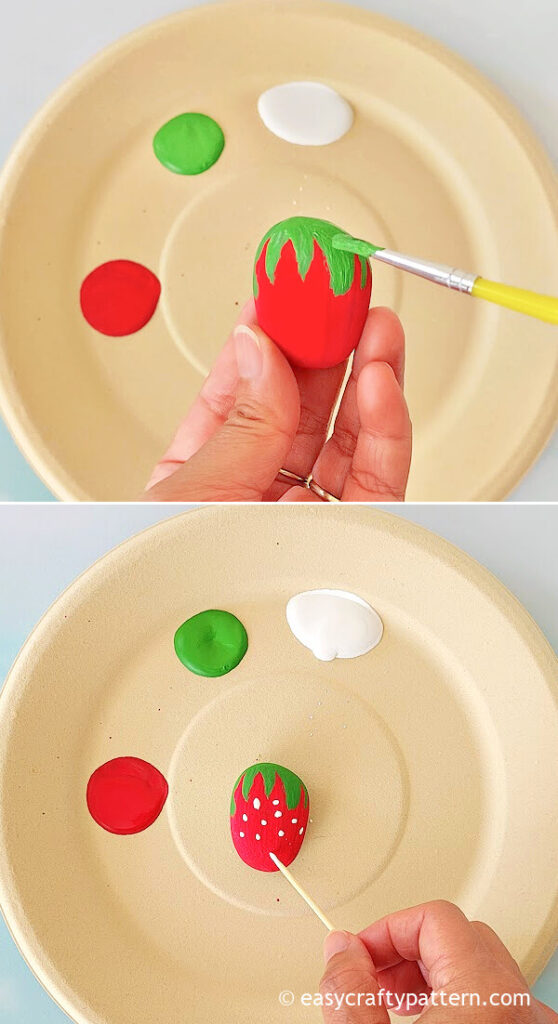
Apply the green paint around the top edge as the calyx or leaf cap.
Paint it to resemble the leaf cap.
Leave it for about 10 minutes until the paint dries up.
Use the toothpick to apply white dots around the red paint to resemble the seed.
Leave it for about 10 minutes until the paint dries up.
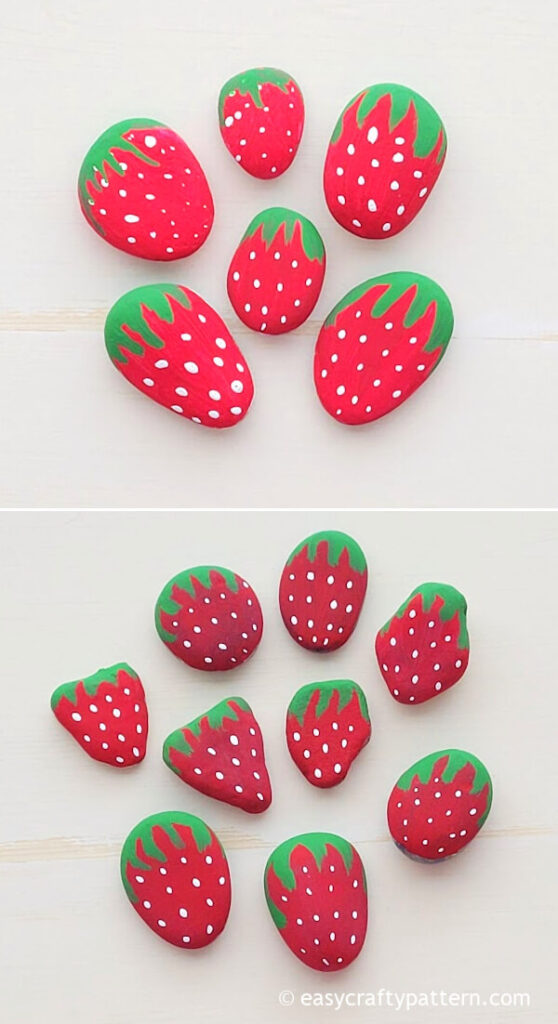
Repeat the process if you want to make multiple strawberry-painted rocks.
Once all dry up, you can apply the seal coating over it.
(But I skip the seal coating. The acrylic paint will last four weather seasons over a few years outside.)
To paint the rock on both sides, apply the white paint on both sides.
Then continue the process the same as the single-sided strawberry rocks.
Do Strawberry Rocks Work
Yes, it does. Based on what I see, the strawberry-painted rocks work like a charm in my garden. Before I put these painted rocks, birds keep eating strawberries if I don’t cover the strawberry patch with tulle fabric for netting.
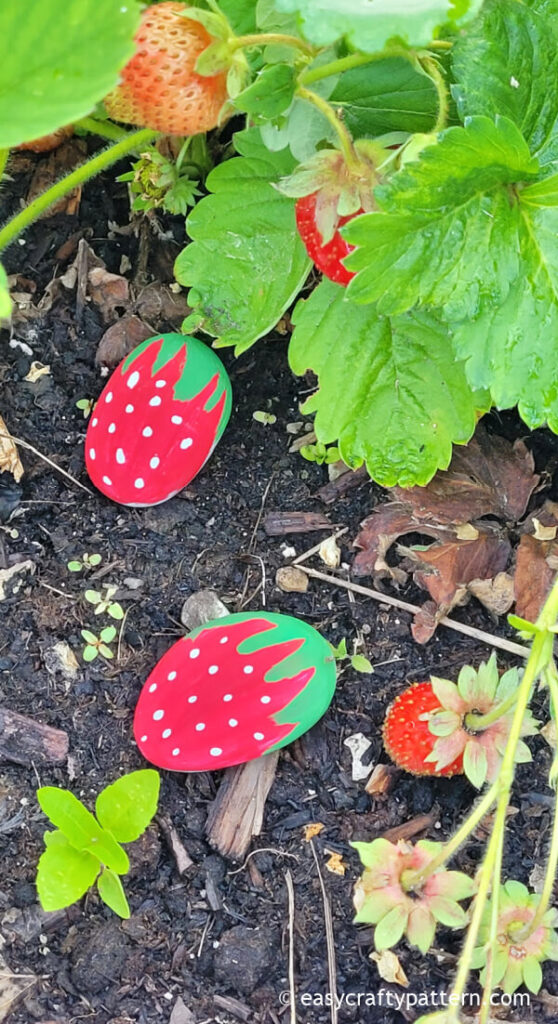
After I put a few painted rocks around the strawberry plants, I got to pick plenty of strawberries during summer. So, it is worth a try, and certainly, it is an inexpensive craft project for the garden.
Painted rocks to look like strawberries are an easy project all season, especially in the spring, for getting ready to garden. It is a fun project for the whole family. Spread the used newspaper on the table, then let everyone paint the rock into sweet juicy-looking ripe strawberries.
Turn the plain-looking rocks into strawberry-painted rocks to keep the birds away. #rockpaintingideas #rockart Share on XMore craft ideas for summer
DIY Strawberry Rock Painting Ideas
Strawberry Painted Rocks Tutorial For Garden
Turn the round or oval flat rocks into strawberry-painted rocks for the treasure game or for the decoy in the garden to keep birds away.
Materials
- Round or oval-shaped rocks
- White acrylic paint
- Red acrylic paint
- Green acrylic paint
Tools
- Paintbrush
- Toothpick
- Paint pallet or paper plate
Instructions
- Paint the rocks with white paint as the base colour.
- Paint the rock on one or both sides.
- Leave it for about 10 minutes until the paint dries up.
- Apply the red paint over the white one.
- Leave it for about 10 minutes until the paint dries up.
- Apply the green paint around the top edge as the calyx or leaf cap.
- Paint it to resemble the leaf cap.
- Leave it for about 10 minutes until the paint dries up.
- Use the toothpick to apply white dots around the red paint to resemble the seed.
- Leave it for about 10 minutes until the paint dries up.
- Repeat the process if you want to make multiple strawberry-painted rocks.
- Once all dry up, you can apply the seal coating over it, or skip it.
Notes
The additional time is for drying each paint coating.