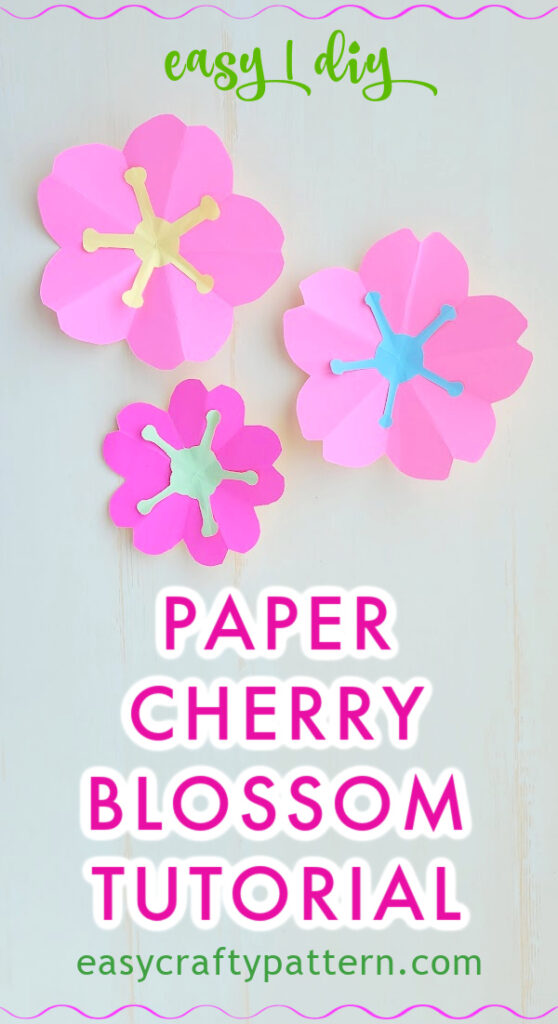
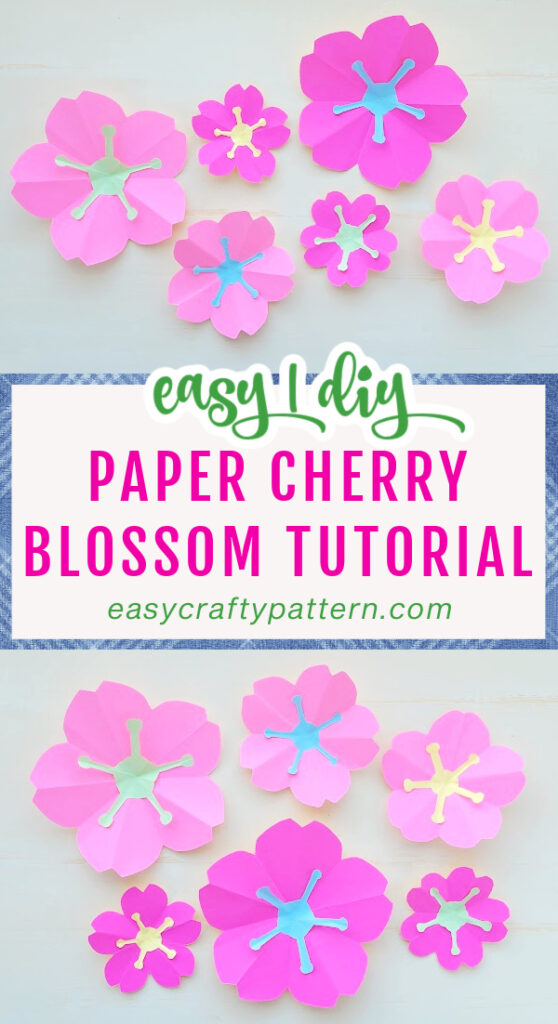
Easy Paper Cherry Blossom Craft
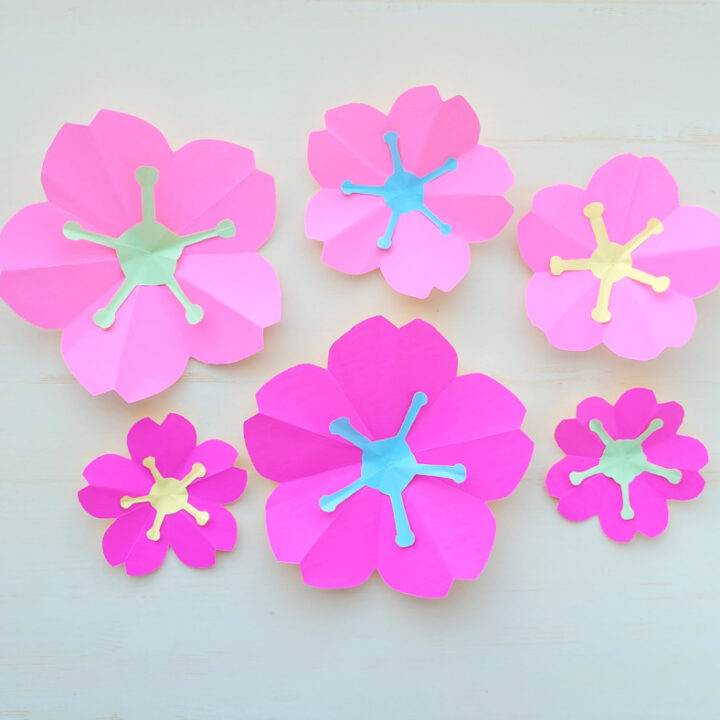
Turn the two square papers into this easy paper cherry blossom, an easy and quick paper flower craft for spring decoration or use it for another craft project around the house.
Easy Origami Cherry Blossom
With this easy-folding paper, you can make paper cherry flowers and stamen. Use two different colors of paper to contrast the flower and the stamen.
The paper size for the flower is bigger than the one used for the stamen. You can use this cherry blossom to incorporate it into several quick craft ideas like bunting or a bouquet.
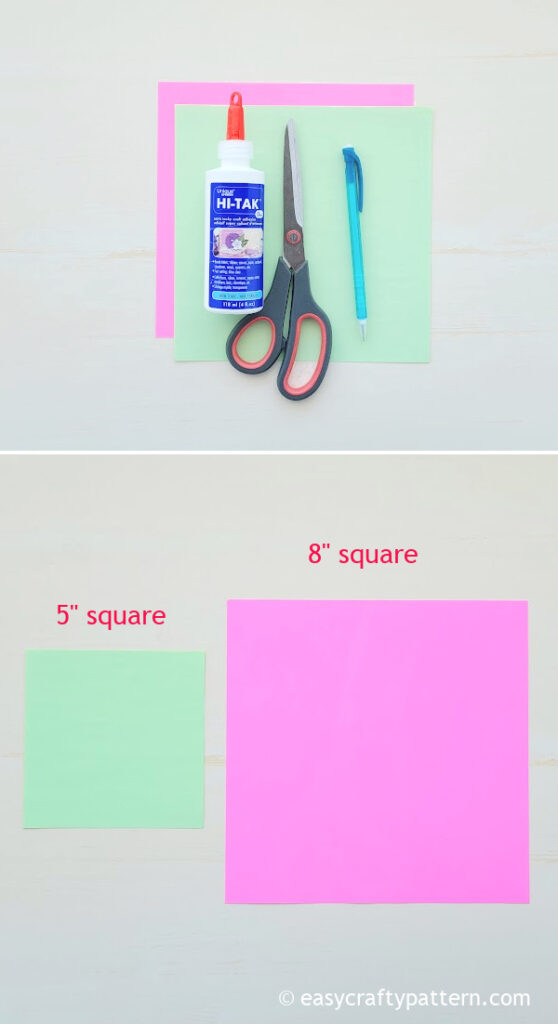
Supply To Make Paper Cherry Blossom
Use pink or light purple origami square paper to make this flower. Use the 5″ squares paper for the stamen.

Use tacky glue or white glue to join the stamen and flower. Make sure the scissor is sharp enough to cut several layers of paper. Even using origami paper, the multiple layers are quite thick.
- 8″ Light pink origami paper
- 5″ green, yellow, or blue origami paper
- Tacky glue
- Scissors
- Pencil
Paper Cherry Blossom Tutorial
To make the cherry flower petal, place the 8″ square paper on the table and lay it flat like a diamond shape. Then, fold the paper half from the bottom to the top corner, which resembles a triangle. Press the crease along the folded edge.
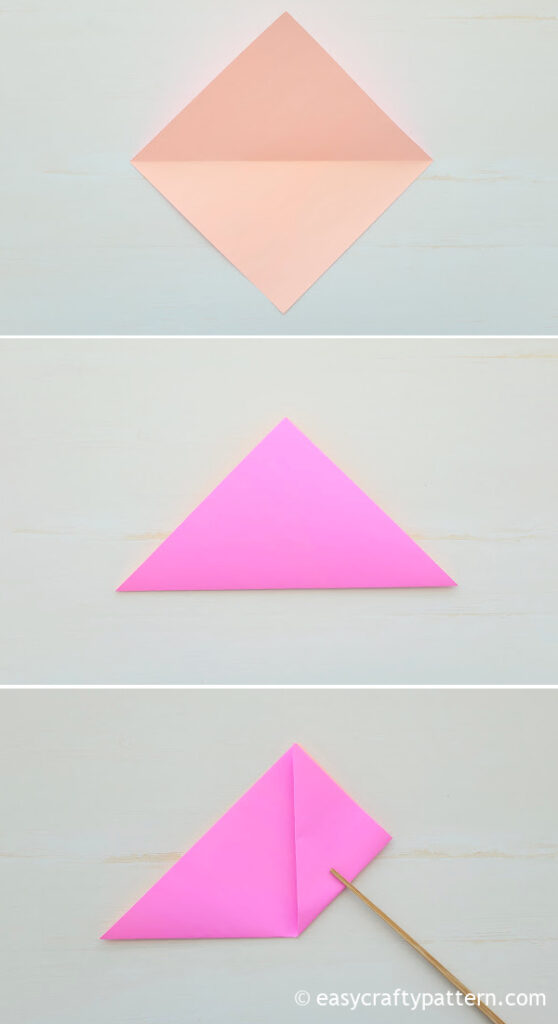
Fold the right side corner to bring it over to the top corner. Press the crease in the middle and the side to give a mark on the folding spot.
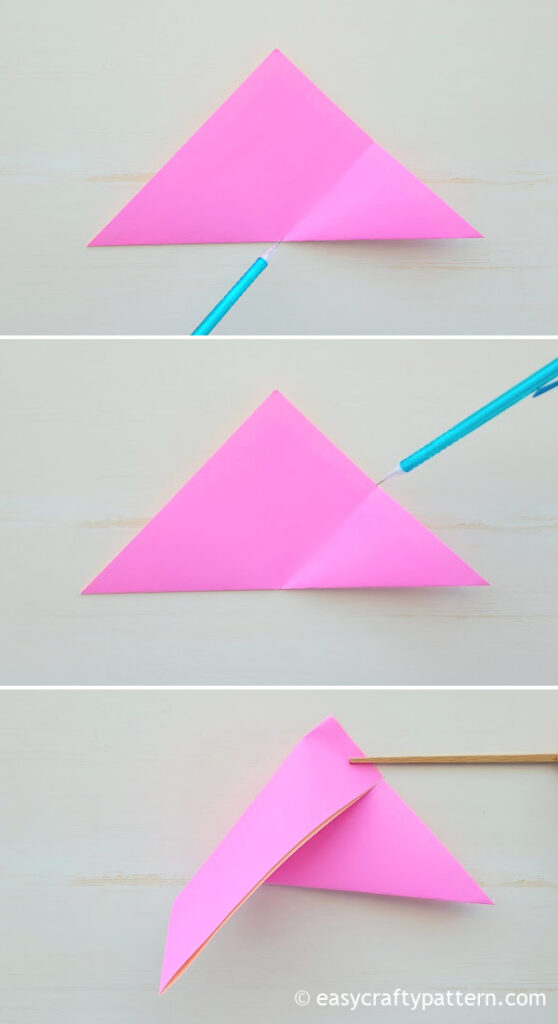
Open the triangle out again, and use a pencil to mark the folding spot to help you locate the crease.
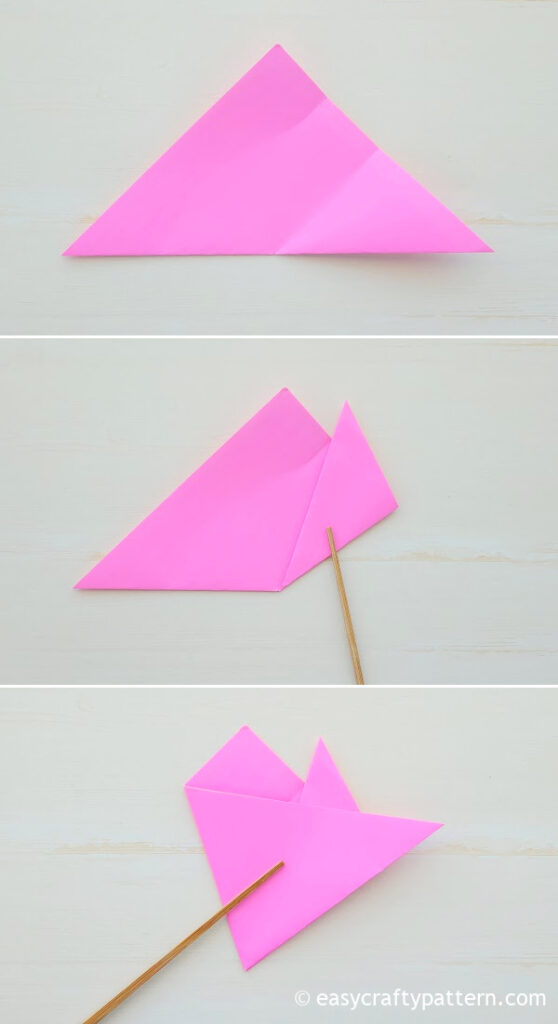
Fold the top corner to the side crease where you marked it before. Press the crease on the crease on the top to mark it, then open the triangle again. Mark the crease with the pencil.
Fold the right corner to the marked crease below the top corner.
Fold the left-hand corner to the right so the half-bottom edge crease aligns with the right-side edge. Then, fold the corner back to the left, aligning the edge on the left side.
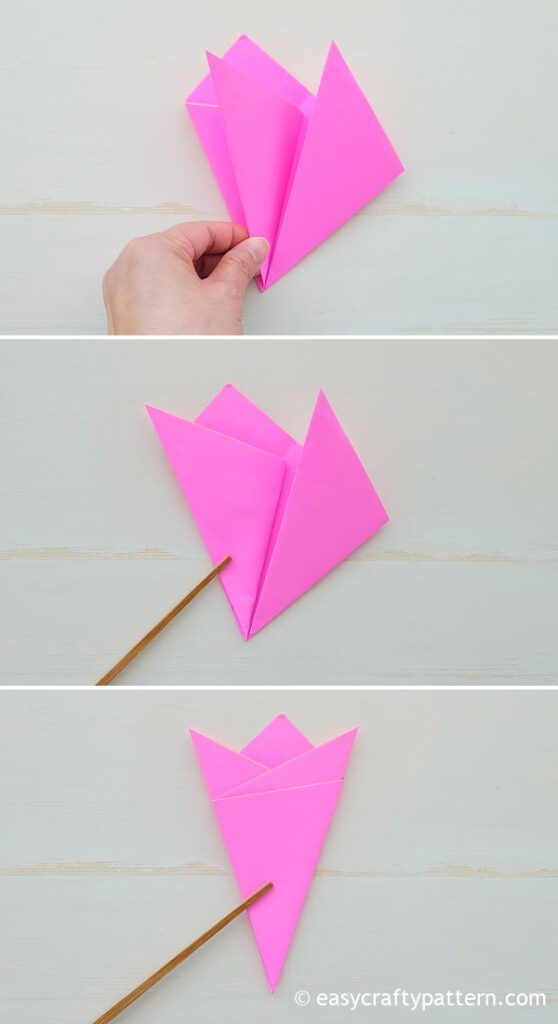
Fold the right side corner to the left and align with the edge on the left.
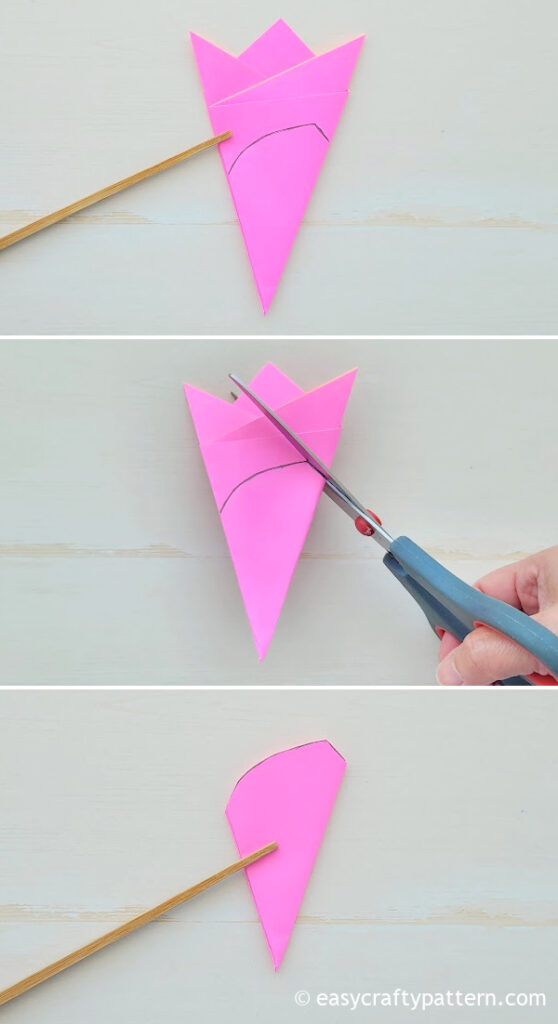
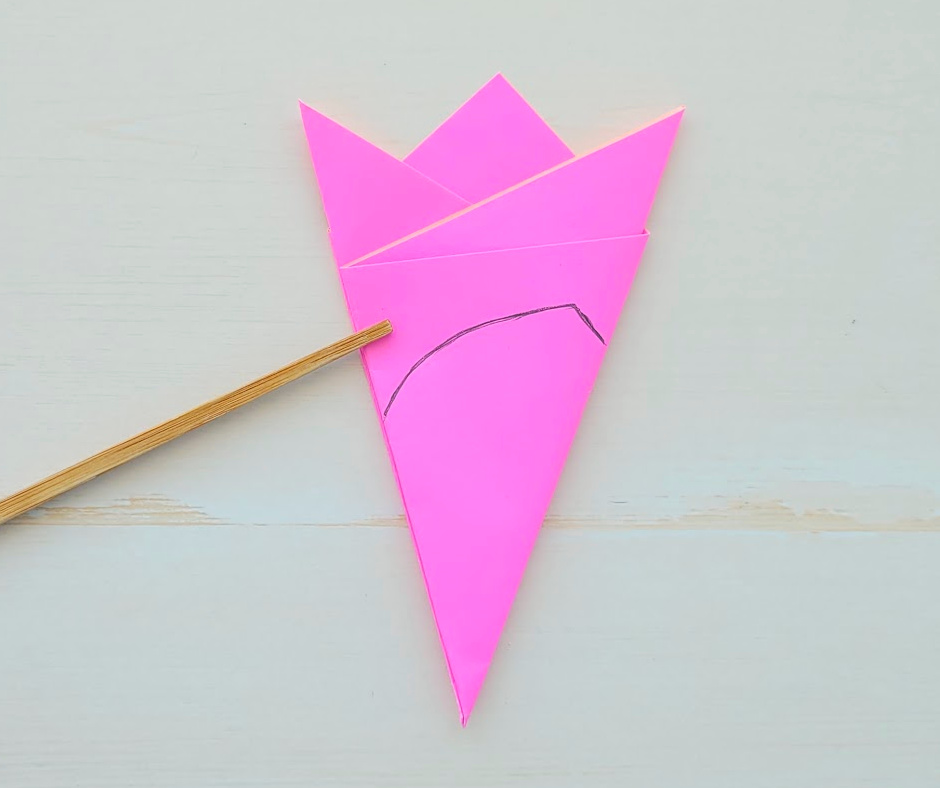
Draw the shape of the folded paper like in the image above. You can draw one that exactly looks like that or change the shape on the corner top to more round or oval, depending on your preference.
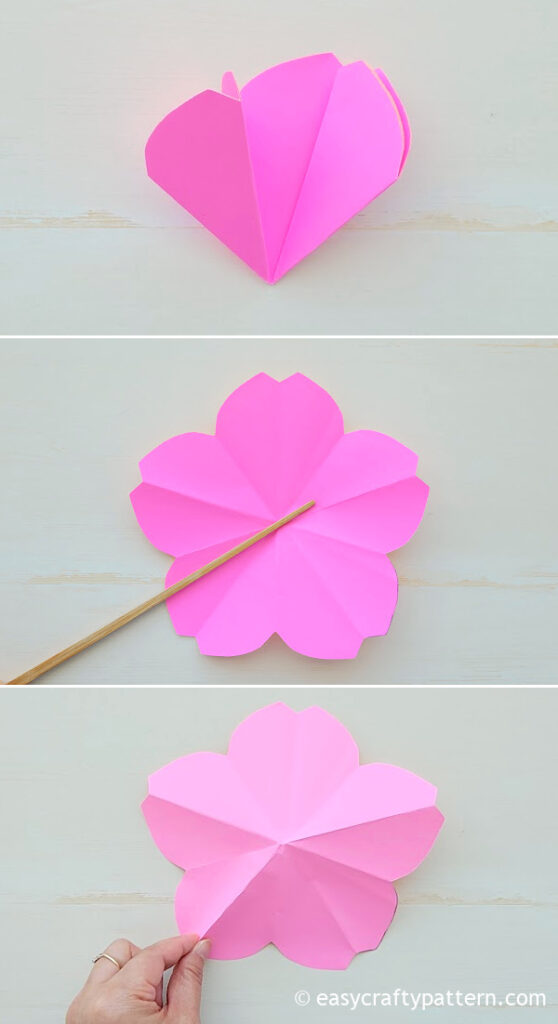
Cut the paper along the line. Carefully open the folded paper and make all creases face the same direction in the middle of each petal.
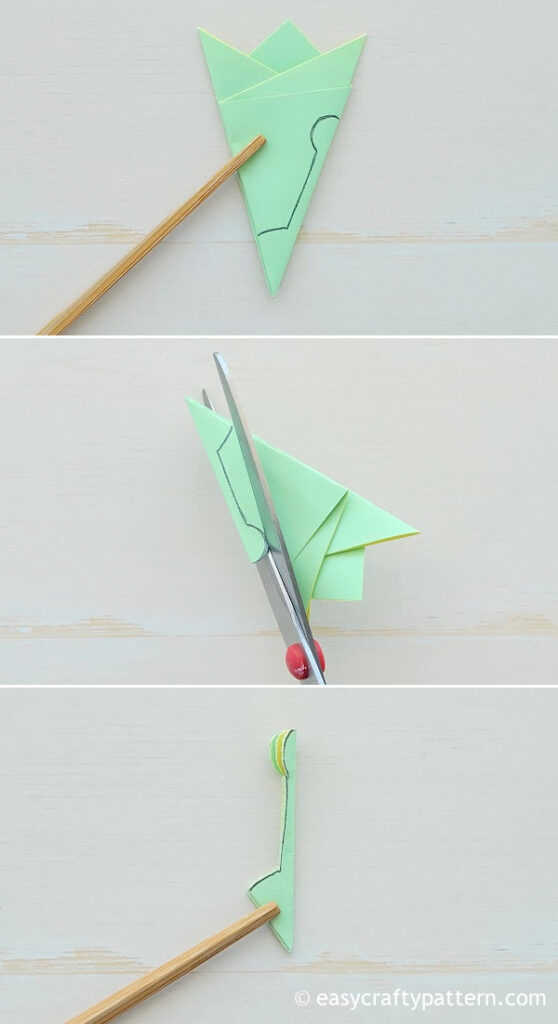
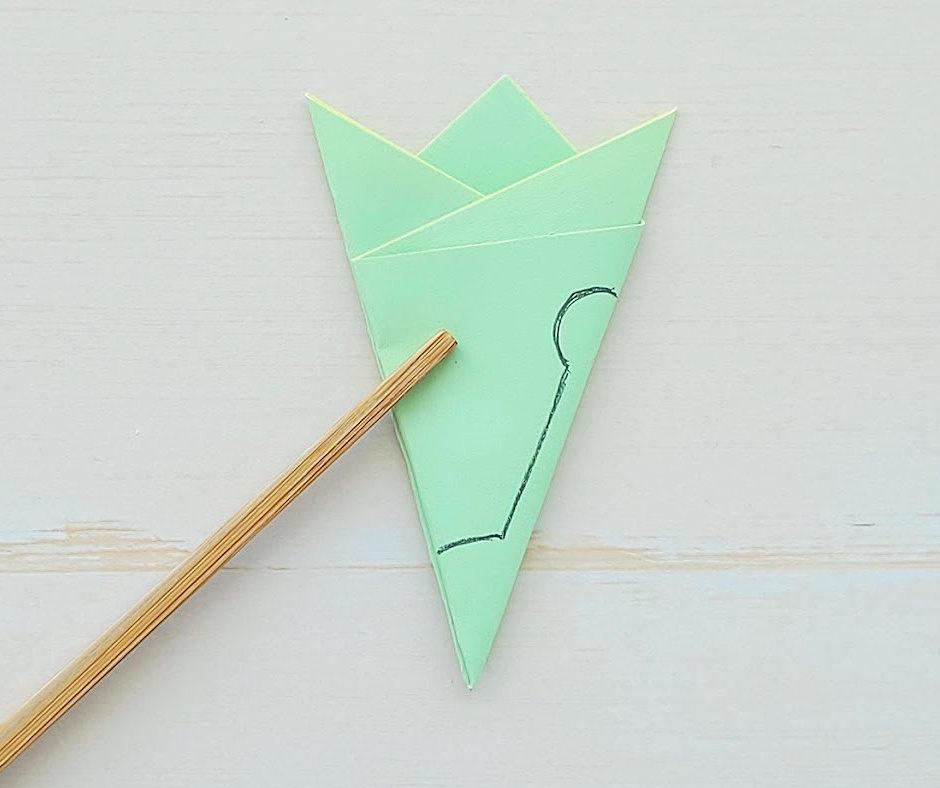
To make the cherry blossom stamen, fold the 5″ square paper like the flower petal above. Draw the folded paper as shown in the image above. Cut the paper along the line. Carefully open the folded paper, as it has thin five-point stamens.
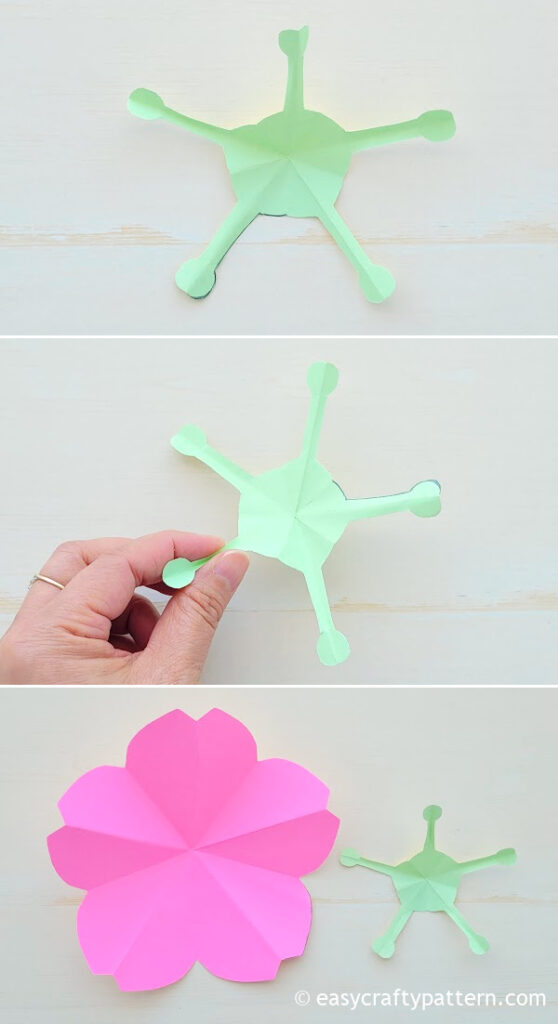
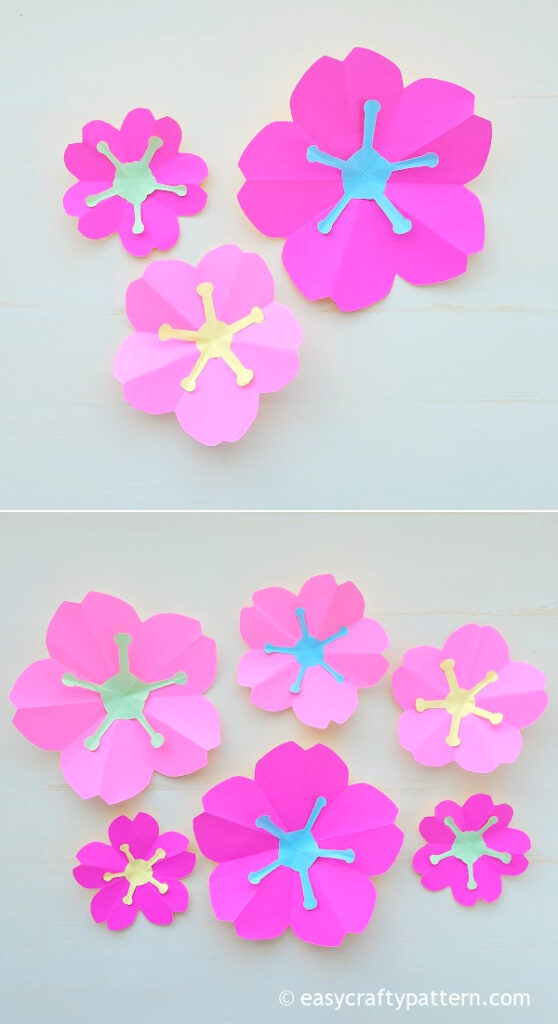
Apply the glue in the middle of the flower petal. Attach the center disc of the stamen to the flower petal.

The paper cherry blossom is ready for use in other craft projects or as a finished paper flower.
If you use this paper cherry flower for quick wall decoration, glue several colors and sizes of flowers on a canvas frame.
Make an easy spring banner by gluing the back of each flower to a long ribbon and placing it on the wall as a paper flower garland.
For an easy Mother’s Day craft idea, make various paper cherry flower sizes, glue the backs of several flowers to paper straws, long skewers, or dried twigs, and place the bouquet in a fabric-wrapped mason jar.
Use this paper flower craft to make cherry blossoms for an easy decorating idea. #paperflower #origamiflower #cherryblossom Share on XMore Of Easy Flower Craft
- Felt Daisy Flower Tutorial
- Cupcake Liner Flower Tutorial
- Crepe Paper Lollipop Flower
- DIY Chocolate Flower Bouquet
- Paper Tulip Tutorial
DIY Cherry Blossom Craft From Paper
Easy Paper Cherry Blossom Craft
Turn the two square papers into this easy paper cherry blossom, an easy and quick paper flower craft for spring decoration or use it for another craft project around the house.
Materials
- 8" Light pink origami paper
- 5" green, yellow, or blue origami paper
- Tacky glue
Tools
- Scissors
- Pencil
Instructions
- To make the cherry flower petal, place the 8" square paper on the table and lay it flat like a diamond shape. Then, fold the paper half from the bottom to the top corner, which resembles a triangle. Press the crease along the folded edge.
- Fold the right side corner to bring it over to the top corner. Press the crease in the middle and the side to give a mark on the folding spot.
- Open the triangle out again, and use a pencil to mark the folding spot to help you locate the crease.
- Fold the top corner to the side crease where you marked it before. Press the crease on the crease on the top to mark it, then open the triangle again. Mark the crease with the pencil.
- Fold the right corner to the marked crease below the top corner.
- Fold the left-hand corner to the right so the half-bottom edge crease aligns with the right-side edge. Then, fold the corner back to the left, aligning the edge on the left side.
- Fold the right side corner to the left and align with the edge on the left.
- Draw the shape of the folded paper like in the image above.
- Cut the paper along the line. Carefully open the folded paper and make all creases face the same direction in the middle of each petal.
- To make the cherry blossom stamen, fold the 5" square paper like the flower petal above.
- Draw the folded paper as shown in the image above. Cut the paper along the line. Carefully open the folded paper, as it has thin five-point stamens.
- Apply the glue in the middle of the flower petal. Attach the center disc of the stamen to the flower petal.
- The paper cherry blossom is ready for use in other craft projects or as a finished paper flower.
Notes
The paper cherry blossom can be used for other craft projects:
- Paper cherry blossom garland
- Paper flower bouquet by gluing several flowers to the paper straw or dried twigs
- An easy 3D framed flower by gluing several sizes of paper cherry blossoms on the canvas