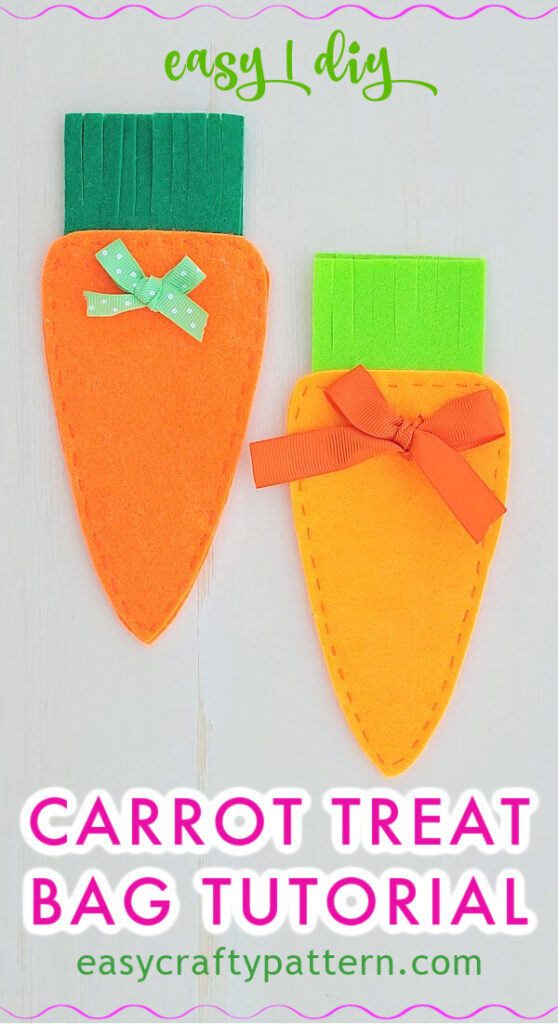
Felt Carrot Treat Pouch Tutorial
This craft tutorial is for making a DIY felt carrot treat pouch, which uses a ribbon as the fastener to keep the treat inside the bag.
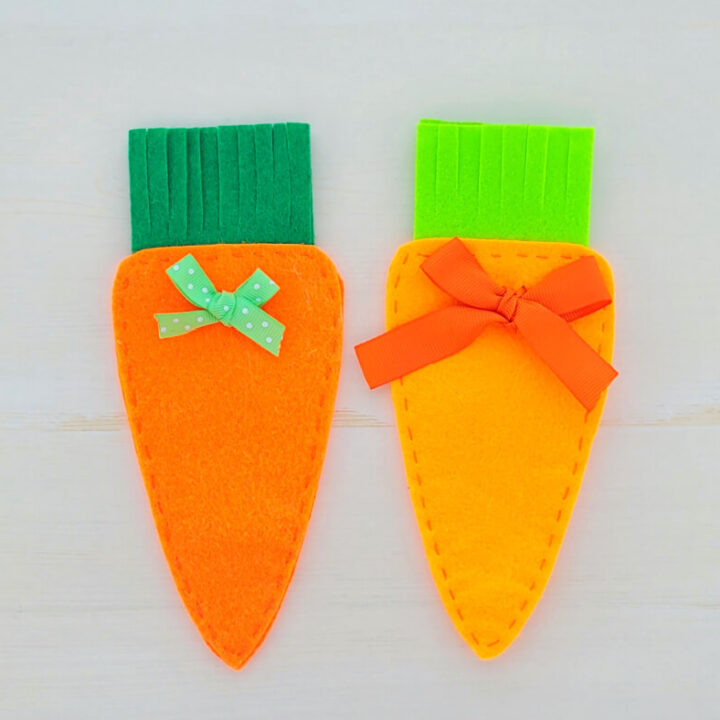
Carrot Shape Treat Bag From Felt And Ribbon
There are so many craft projects you can do for spring, especially when Easter is approaching. The carrot-shaped treat bag is one of them.
Pair it with the Easter egg treat pouch for an easy gift-giving idea, and use multiple color felt for colorful egg bags on both sides.
Supply To Make Felt Carrot Candy Pouch
You can put it together using a hand-sewing needle or sewing machine. Use tacky glue instead to skip the sewing process.
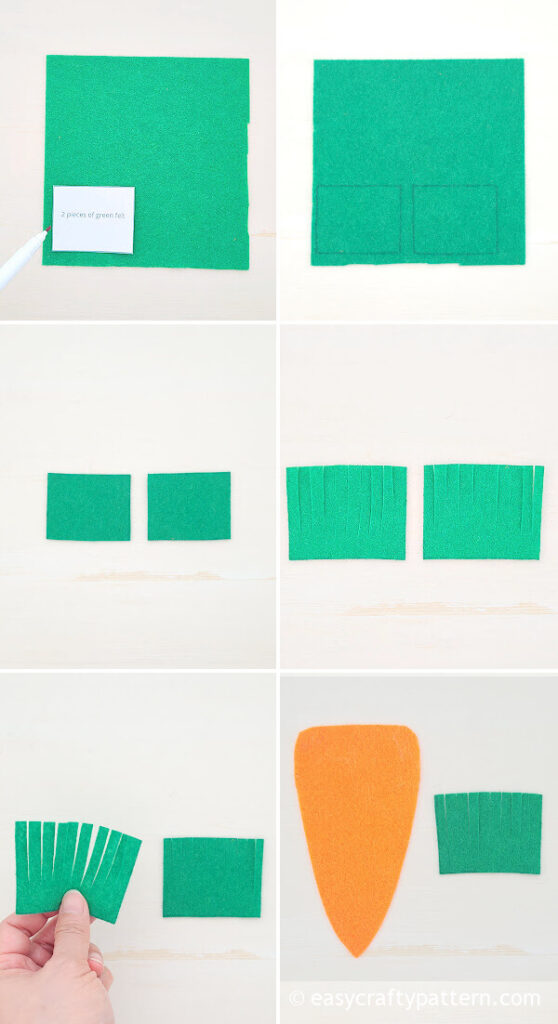
- 6″ squares green felt
- 6″ squares orange felt
- 12″ green ribbon or orange ribbon
- Carrot template printable
- Lighter
- Seam ripper
- Thread
- Scissors
- Ruler
- Hand sewing needle
Felt Carrot Treat Pouch Tutorial
Print the carrot treat bag template using the link above.
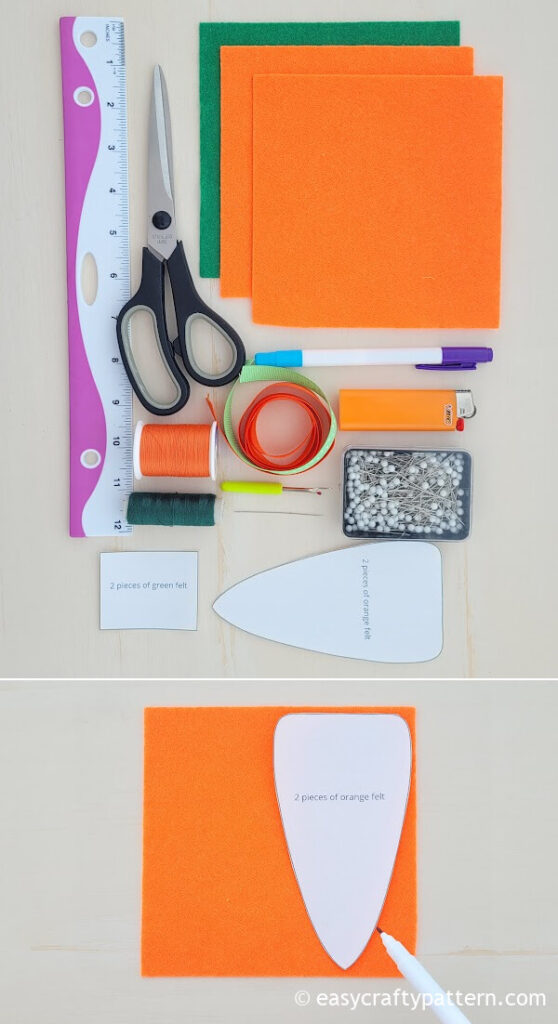
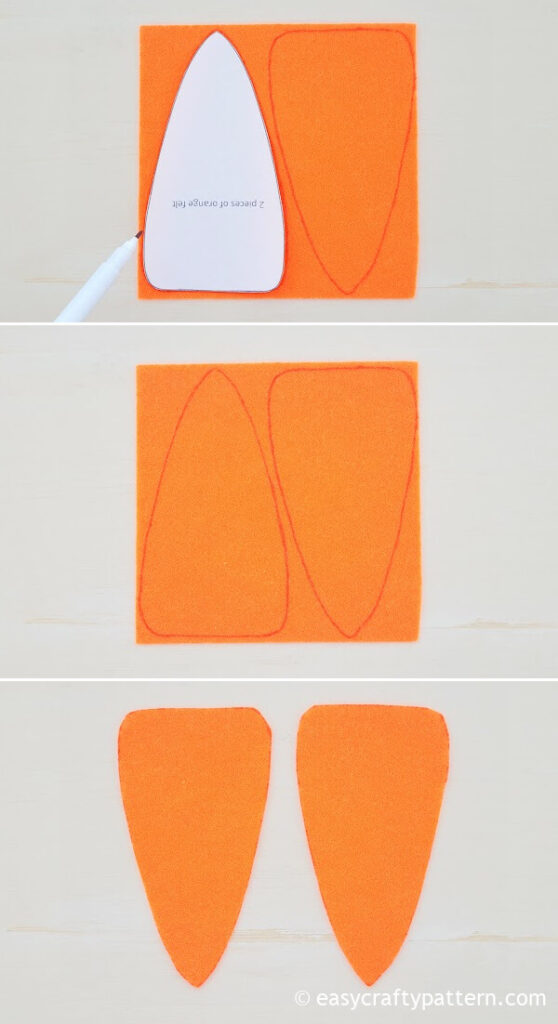
Trace the carrot pouch template on the felt.
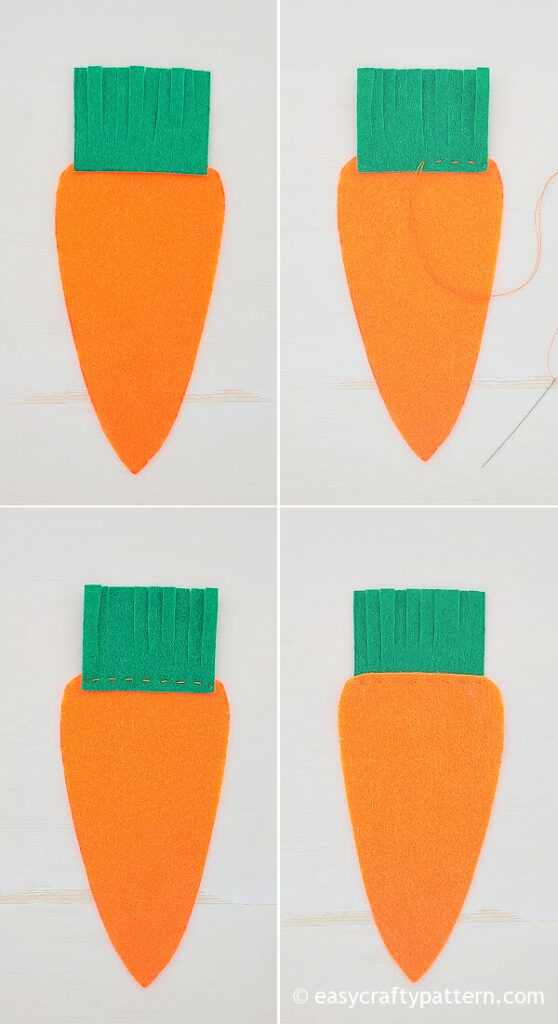
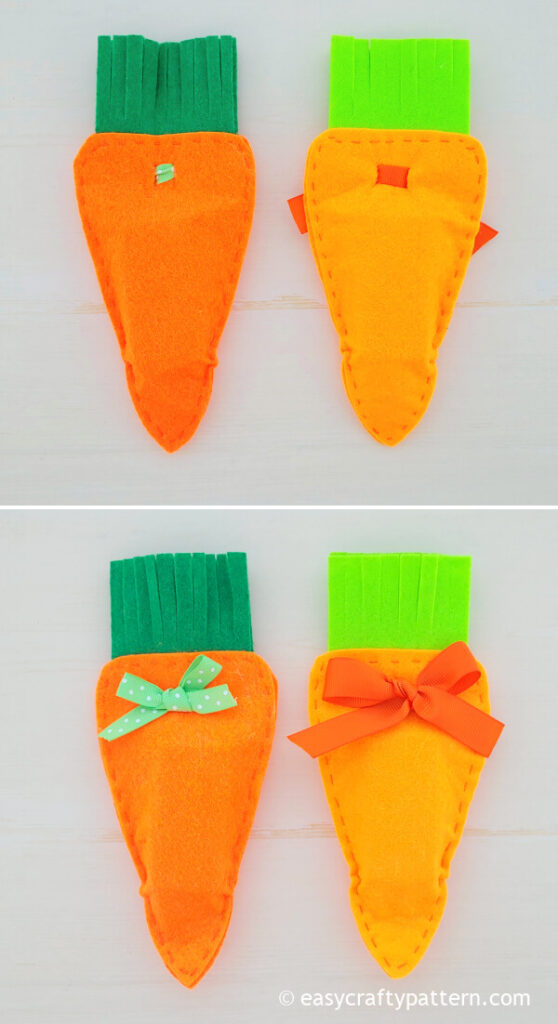
Trace the carrot top template (the rectangle shape) on the green felt. Fringe cut the green felt pieces.
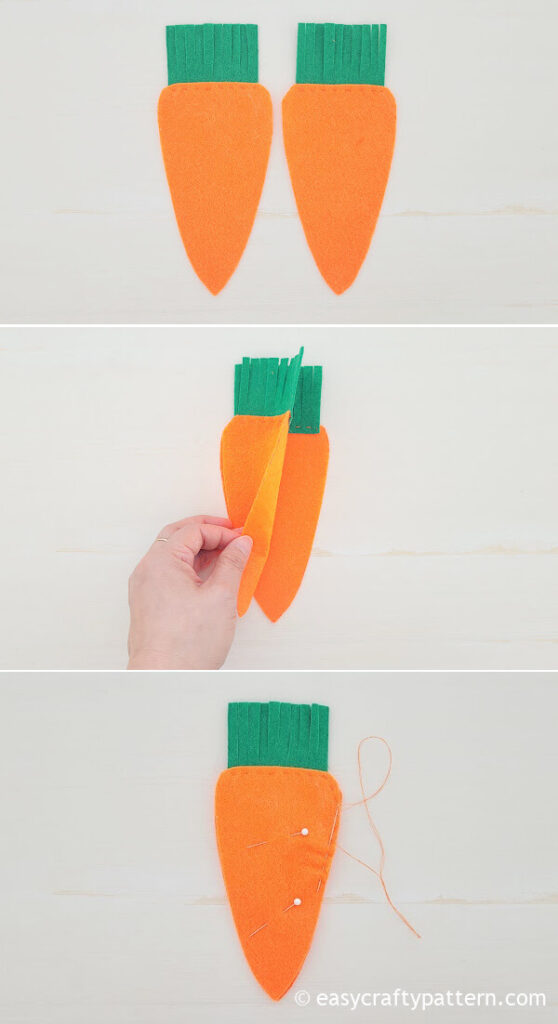
Sew the green felt to the top of the orange carrot felt.
Pin together both carrot felt pieces and straight stitch around the edge of the carrot shape.
Mark two lines on the carrot top below the green felt on the front and back sides.
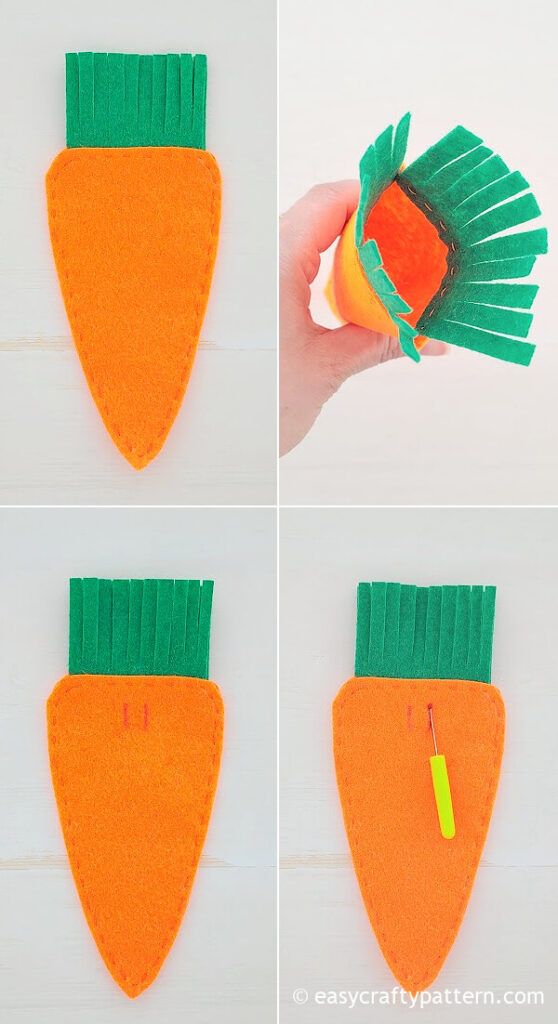
Use the seam ripper to cut the marked lines on both sides.

Use a lighter to seal the ribbon’s raw edge. Insert the ribbon into both slit cuts on the backside.
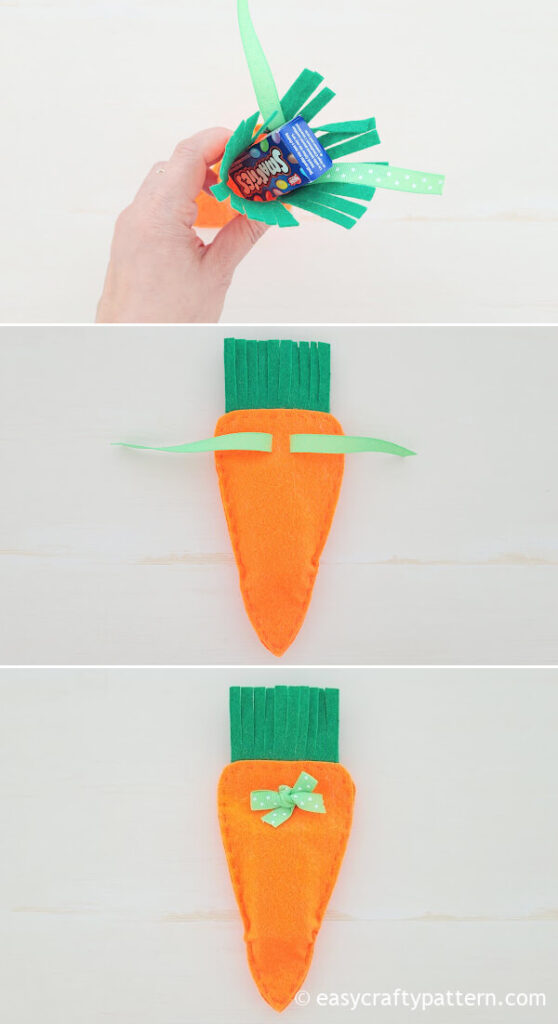
Put the treat into the pouch, then insert the ribbon into both slit cuts on the front side.
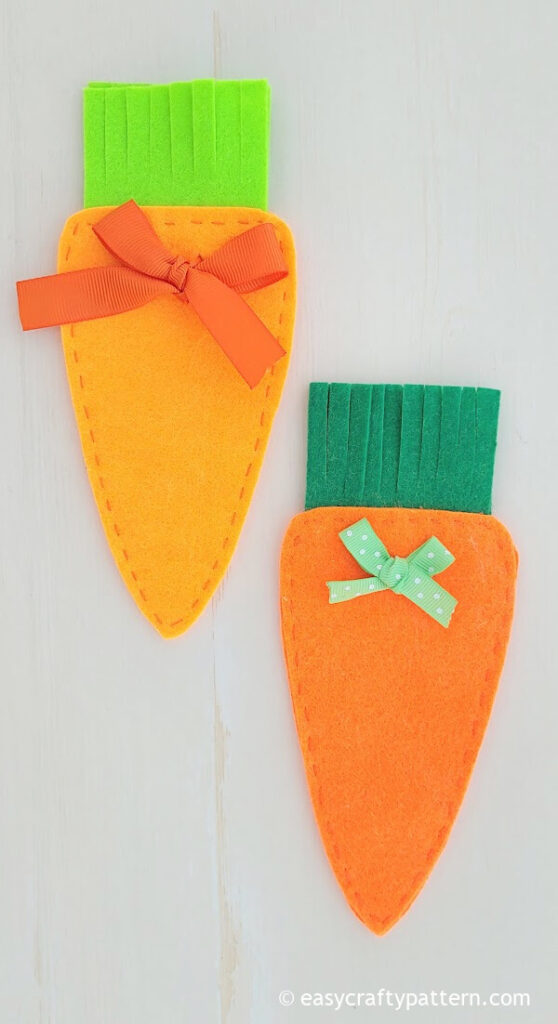
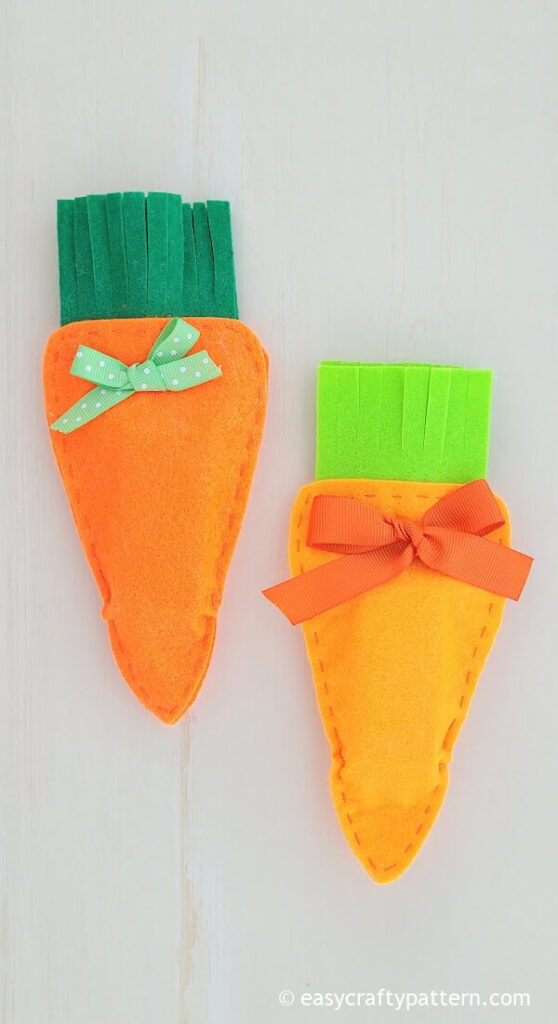
Knot the ribbon and make a bow.
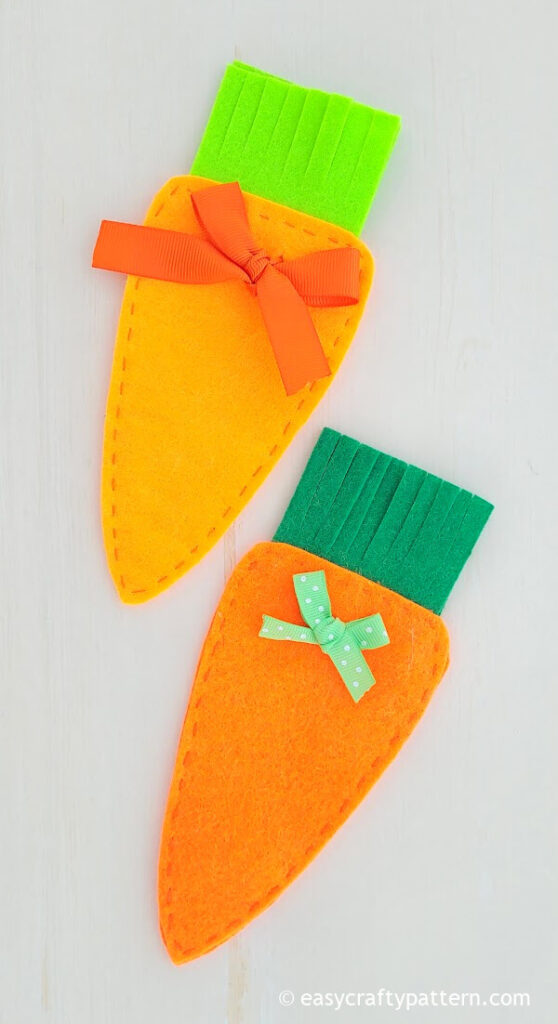
The felt carrot treat pocket has enough space for a few candies. You can make a larger carrot pouch by modifying the template and using larger felt sheets.
If you are into sewing, this Easter bunny treat bag from fabric is also easy to make. The bag is reversible so you can use two fabric colors or prints on both sides.
This painted bunny mason jar is an easy, no-sewing craft project. You can use it to store candies for treats or as a vase for a spring flower bouquet.
Turn the orange and green ribbon into the carrot treat pouch for the easy Easter craft. #Eastercraft #carrotbag #treatbag Share on XMore Easy Crafts From Felt.
DIY Felt Carrot Pouch With Ribbon

Felt Carrot Treat Pouch Tutorial
This craft tutorial is for making a DIY felt carrot treat pouch, which uses a ribbon as the fastener to keep the treat inside the bag.
Materials
- 6" square green felt
- 5" square orange felt
- 12" green ribbon or orange ribbon
- Carrot treat pouch template printable (see the note below)
Tools
- Lighter
- Seam ripper
- Thread
- Scissors
- Ruler
- Hand sewing needle
Instructions
- Print the carrot treat bag template using the link above.
- Trace the carrot pouch template on the felt.
- Trace the carrot top template (the rectangle shape) on the green felt. Fringe cut the green felt pieces.
- Sew the green felt to the top of the orange carrot felt.
- Pin together both carrot felt pieces and straight stitch around the edge of the carrot shape.
- Mark 2 lines on the carrot top below the green felt on the front and back sides.
- Use the seam ripper to cut the marked lines on both sides.
- Use a lighter to seal the ribbon's raw edge.
- Insert the ribbon into both slit cuts on the backside.
- Put the treat into the pouch, then insert the ribbon into both slit cuts on the front side.
- Knot the ribbon and make a bow.