Easy Decoupage Pumpkin With Napkins
Use fun-looking print paper napkins to decoupage pumpkin for an easy fall season craft idea and no-carve pumpkin project for Halloween.
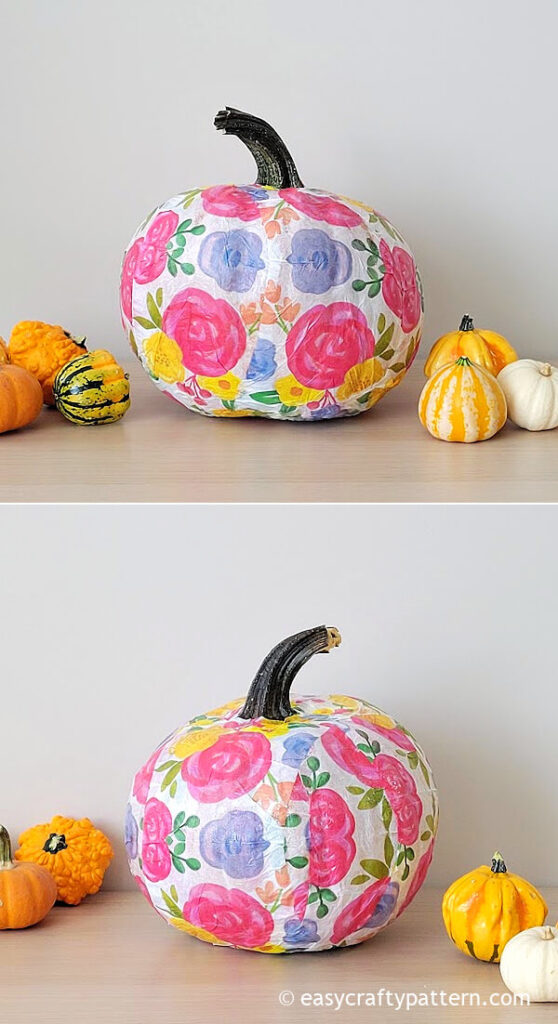
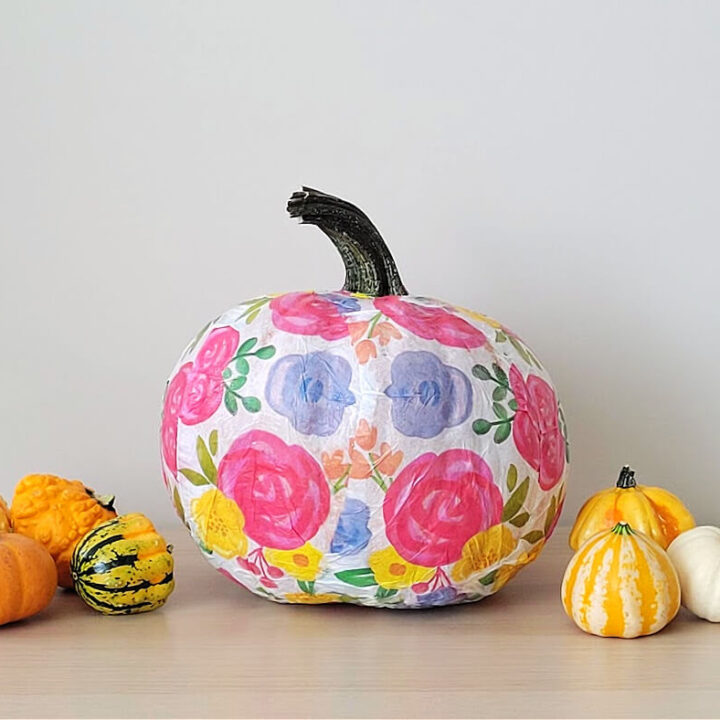
Decoupage Pumpkin Craft
Having easy decor for Halloween and autumn is like a dream, especially when you want the no-carve pumpkin project.

There are so many ideas to choose from. One is to decoupage the pumpkin with Mod Podge and paper napkins. Also, it is fun to say napkin pumpkin or pumpkin napkin.
Can You Decoupage A Real Pumpkin
The answer is yes. Mod Podge will stick to the faux or real pumpkin.
I have no problem decoupage a real pumpkin. It just needs good support when you finish sealing the decoupage around the bottom part of the pumpkin. Put it upside down on the working table or use a bowl for the support.
The difference is the weight between both depending on the size of the pumpkin. The faux one might be lighter, so it is easier to decoupage the whole pumpkin when putting it upside down.
Also, the shelf life of the pumpkin makes a difference. By using faux pumpkin, you can reuse it again in the next season or change the napkin print for a different pumpkin theme. If you use a real pumpkin, it only lasts a season or probably for a few weeks due to the pumpkin rot and needs to be tossed.
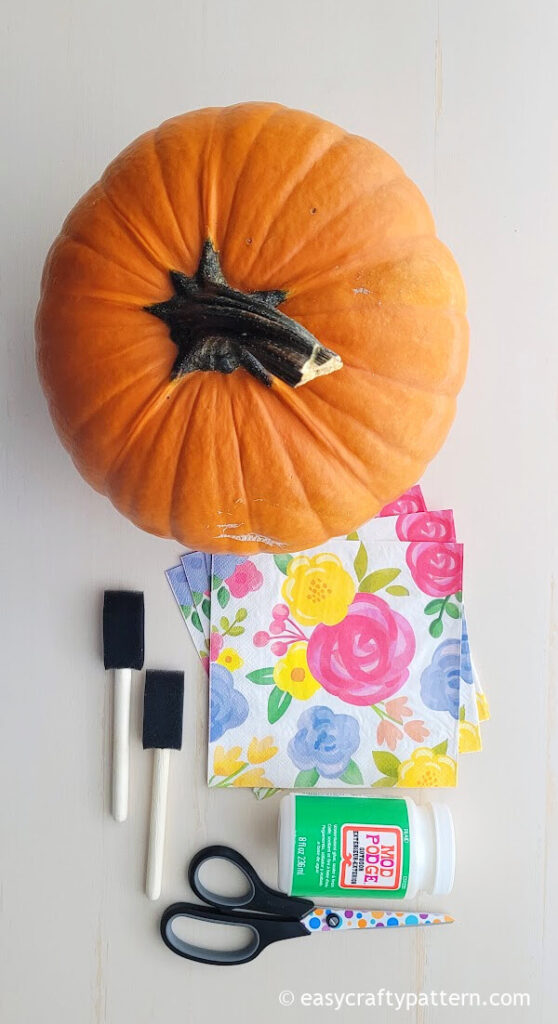
Supply To Decoupage Pumpkin
- Pumpkin any size, a faux or real one
- Mod Podge
- Foam brush
- Paper napkins you like
- Scissors (optional)
Decoupage Pumpkin With Napkins Tutorial
Wipe the pumpkin from dust or debris with a dry, clean towel or paper towel.
Turn the paper napkins into several strips or tear them apart to make random shapes.

Put the pumpkin on a paper plate or an old newspaper.

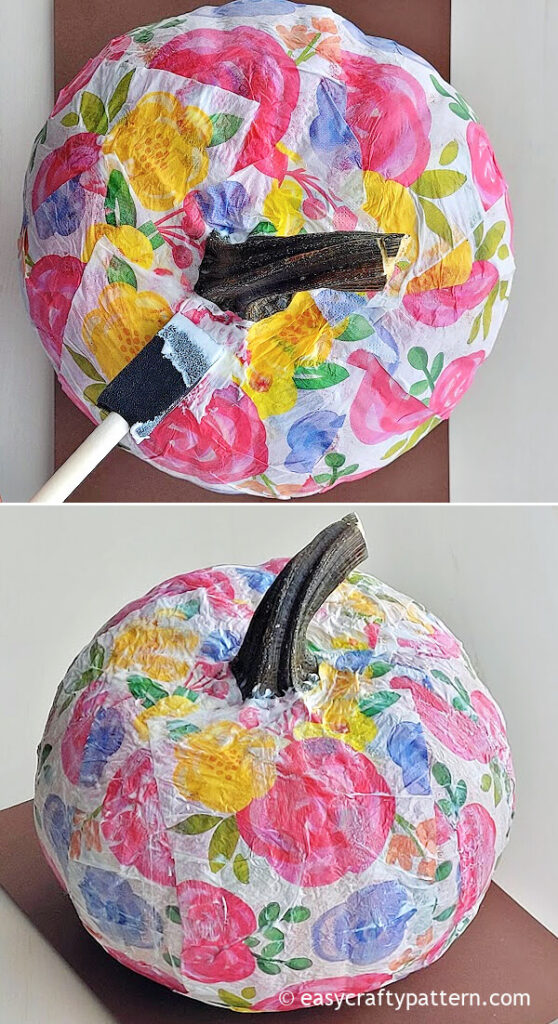
Apply Mod Podge on the pumpkin surface.
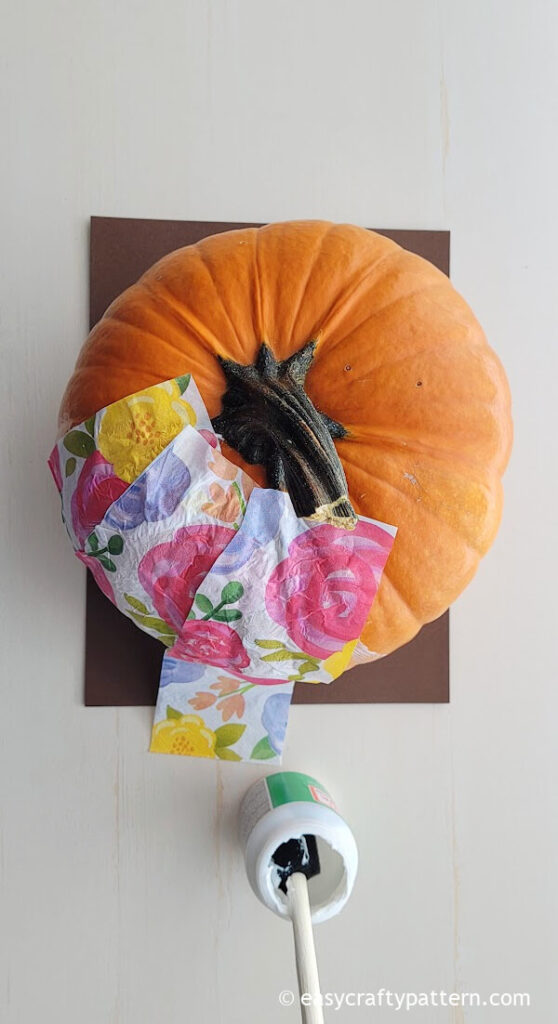
Attach the paper napkins on top of the glue.
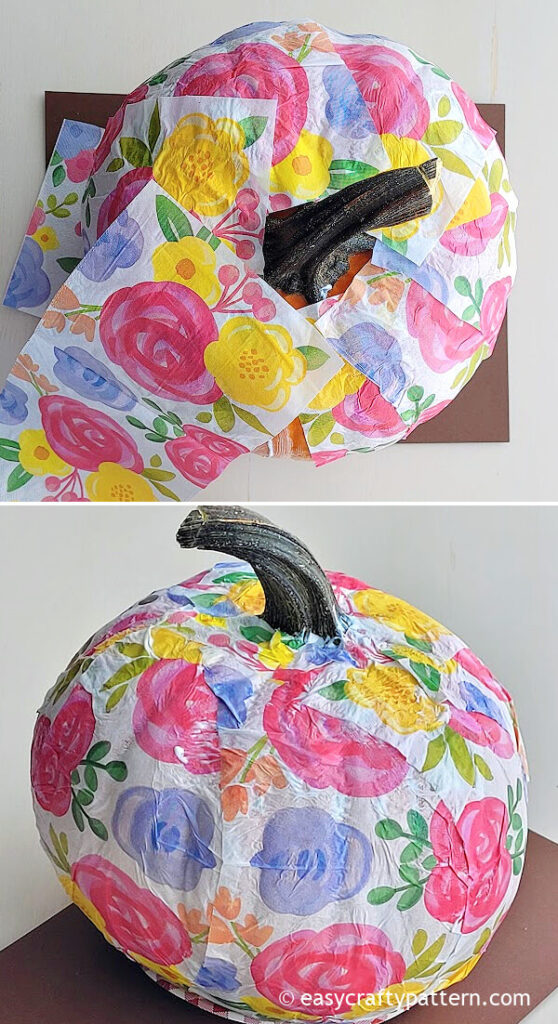
Continue applying Mod Podge and attaching the paper napkin pieces until the whole pumpkin is covered.
To decoupage the bottom of the pumpkin, turn it upside down and apply glue and paper napkin pieces on top of it.
If needed, let the top pumpkin dry first, then turn it upside down and decoupage it.
Let the first coat of Mod Podge glue dry for around 30 minutes to an hour.
Once it dries, apply more Mod Podge over the paper napkins and let it dry for 30 minutes to an hour.
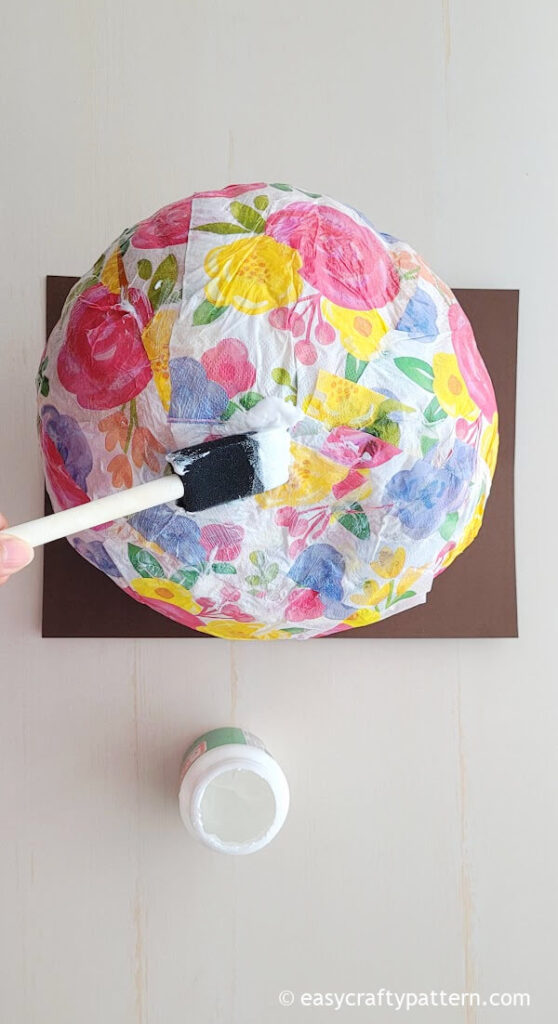
Put the pumpkin upside down on the working surface or the bowl.
Apply Mod Podge over the paper napkins at the bottom of the pumpkin.
Let the decoupage pumpkin dry for 30 minutes to an hour, or leave it overnight.
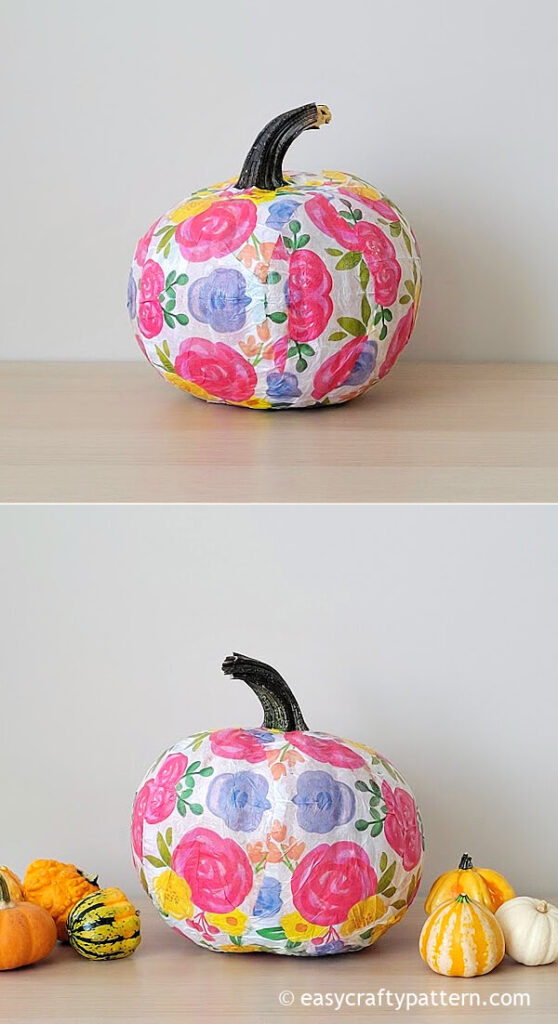
The DIY decoupage pumpkin is ready to display. Pair it with this easy luminaire jar for a complete sweater weather decoration.
For a front porch decoration idea, this pumpkin planter is easy and quick to prepare and adds a curb appeal interest during the fall season.
Since this is a real pumpkin, you need to watch it in case the pumpkin turns rot and needs to be tossed.
Covering a real pumpkin with napkins is one of the best ideas for fall season decor. #decoratingpumpkin #nocarvepumpkin Share on XMore Easy Pumpkin Craft
Easy Decoupage Real Pumpkin With Paper Napkins And Mod Podge For Fall Season Craft Project
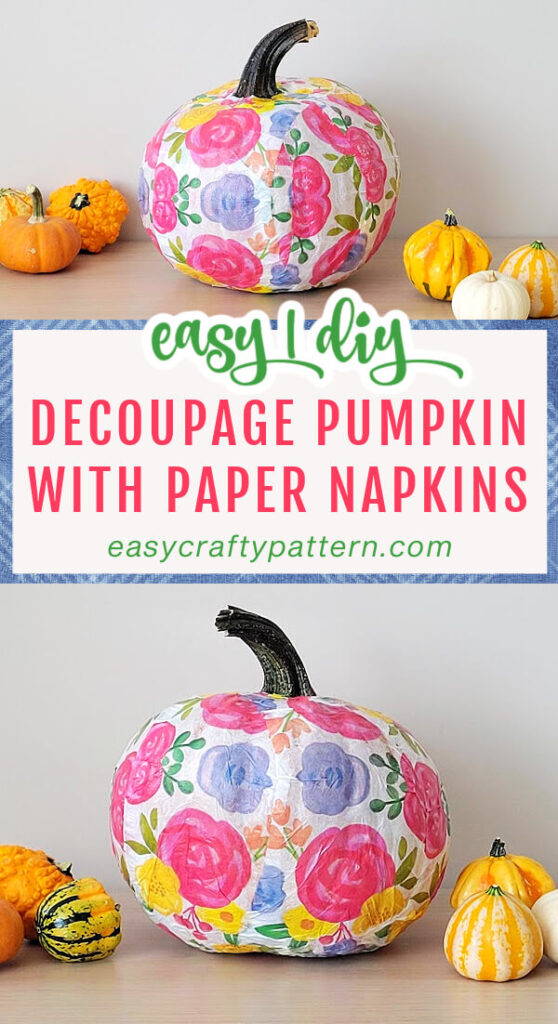
Easy Decoupage Pumpkin With Paper Napkins
Use fun-looking print paper napkins to decoupage pumpkins for an easy fall season craft idea and no-carve pumpkin project for Halloween.
Materials
- Pumpkin any size, a faux or real one
- Mod Podge
- Foam brush
- Paper napkins, any print and color
Tools
- Scissors (optional)
Instructions
- Wipe the pumpkin from dust or debris with a dry, clean towel or paper towel.
- Turn the paper napkins into several strips or tear them apart to make random shapes.
- Put the pumpkin on a paper plate or an old newspaper.
- Apply Mod Podge on the pumpkin surface.
- Attach the paper napkins on top of the glue.
- Continue applying Mod Podge and attaching the paper napkin pieces until the whole pumpkin is covered.
- To decoupage the bottom of the pumpkin, turn it upside down and apply glue and paper napkin pieces on top of it.
- If needed, let the top pumpkin dry first, then turn it upside down and decoupage it.
- Let the first coat of Mod Podge glue dry for around 30 minutes to an hour.
- Once it dries, apply more Mod Podge over the paper napkins and let it dry for 30 minutes to an hour.
- Put the pumpkin upside down on the working surface or the bowl.
- Apply Mod Podge over the paper napkins at the bottom of the pumpkin.
- Let the decoupage pumpkin dry for 30 minutes to an hour, or leave it overnight.
Notes
The total time does not include drying time, which will take 1 to 24 hours.